Tuesday, April 24, 2012

Blur, Gots Some Blur

Here I am attempting to element blur in my pictures. Here is my first picture and my first attempt. It was not too blurry, but I really like this picture and I wanted to make sure it looks good. I followed this tutorial to fix the blur.

Original 

Edited: I feel like this one has more details. However it was not much of an edit, so I tried again with this picture.

Original 

Edited one: I followed the same steps to sharpen the picture as I did above. 

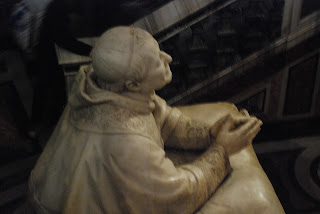
I still felt like I needed to challenge myself so I chose this picture of a statue. This picture is very blurry so I did my best to edit it.

Original: 

First I reduced the blur and sharpened it:

Although this image was sharper, it had a lot of noise. I did my best to use what we learned last year to reduce the noise. 


Sharpening things is a lot of work. It has taught me the importance to making good exposures, so you have less work to do. I just got back from my spring break trip, only to realize that I took my 1300 pictures in low quality JEPG's. Now fixing images is even harder. I'm glad I'm leering the tools though to fix pictures. 


Monday, April 16, 2012

Noise, so much noise

So I just returned home from my spring break trip to London and Italy and let me tell you I took a lot of pictures. Being a backpacker I could not afford (both money and space) to buy too many souvenirs. I bought the essentials (a juice box of wine, and a scarf) but most of the memories of my trip came in the form of pictures. In the 10 days I was there I took over 13000 pictures. Here is one of my pictures from Florence of the Ponte Vecchio or Old Bridge. 

Original  

Noisy spot


For my first attempt to edit this picture I followed a tutorial called Two Minuet Fix of Noise Blur. However I was unhappy with the end result. 


I though that this almost had more noise than the original. 

For my next try I followed tutorial that used a Gaussian Blur. I followed this step by step. I was happy with this but I though that the water still had too much noise. 

I used the magnetic lasso to chose the water and then copy and paste it.  I then used filters like Smart Blur and Dust and Scratches to reduce noise more. 


From there I used the blur tool to blend the extra edited part of the water into the background layer. 

Here is the original noisy part. I think that it has much less noise now. 


Here is the final picture. 


Photoshop CS6

I am very excited to try the new Adobe Photoshop CS6 program. One feature that I think will be extra helpful is that you can search through layers. I know that I always have a lot of open layers, and it would save me so much time if I could easily find a layer that I need. I also like how in incorporates things that we have become popular through cell phone apps. I was trying to edit pictures like Instagram the other day and it took a long time. Although they are simple its fun to have a quick way to change your pictures.